Sous Vide Pulled Pork
Make the most perfectly tender and juicy Sous Vide Pulled Pork using the sous vide cooking method. This BBQ pulled pork is a perfect meal that is both budget friendly and freezer friendly. Pair with any side for a quick and easy dinner. It makes great leftovers too!
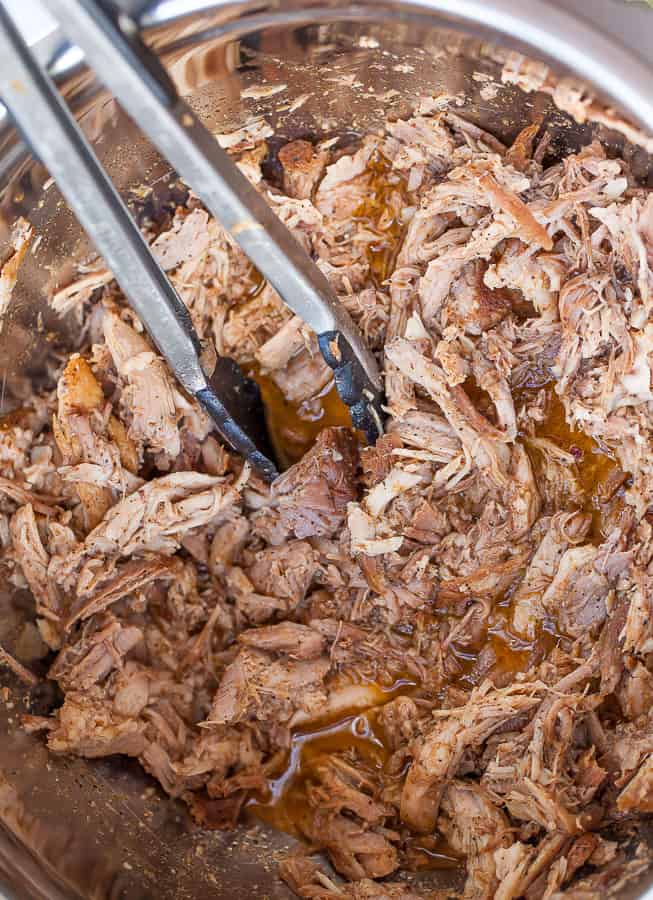
I’ve been on a roll with creating sous vide recipes and I won’t be stopping anytime soon! I love the fact that you can cook protein to a perfect temperature to make each cut of meat shine in the way it’s supposed to.
💭What is sous vide cooking?
Sous vide is French for ‘under vacuum’ and is a method of cooking in which your food is sealed in a bag and cooked in a temperature-controlled water bath.
This allows your food to cook slowly and evenly preserving the taste and texture of the food. Since I started cooking sous vide earlier this year I use it at least three times per week for meal prep and to cook proteins like a pro.
The Immersion Circular I Use: Anova Culinary Sous Vide
🐷Why sous vide is the best way to cook pork.
Since pork is fairly lean, it’s easy to overcook and become dry. Cooking pulled pork sous vide keeps it moist and tender and makes the best pulled pork. Pork is so delicious and sous vide pulled pork couldn’t be easier to cook. There’s nothing worse than dry pork that is too tough to swallow and pulled pork sous vide is the answer!
🔪Best Cuts Of Pork For Sous Vide
Sous vide pulled pork can be made from any fatty pork roast or from a whole hog, but the best cut for pulled pork is the pork shoulder since it is high in fat and connective tissue.
Pork shoulder is sometimes referred to as pork butt, named after the Boston butt cut of the shoulder. The shoulder is absolutely most delicious part of the pig.
⏲How Long To Sous Vide Pork Shoulder
For the best sous vide bbq pulled pork I would recommend cooking the pork shoulder for 18 to 24 hours. I think 24 hours makes the most tender, delicious, best sous vide pulled pork.
My favorite feature of sous vide cooking is the ability to not worry as much about overcooking. The longer the cooking time the more the tender the sous vide pulled pork will become.
🌡Best Temperature for Sous Vide Pulled Pork
A temperature of 155 to 165 degrees Fahrenheit will produce the best sous vide pulled pork. Aside from the flexibility of cooking time, temperature flexibility is the other advantage of sous vide pulled pork.
📖How To Sous Vide Pork Shoulder
1️⃣ Prepare Water Bath: grab a large pot and fill with enough water to cover the pork. Using your sous vide, heat the water bath to 165 degrees.
2️⃣ Prepare The Pork Shoulder: remove from package and pat dry with paper towels. Decide whether or not it needs to be cut into smaller pieces in order to fit in vacuum seal bags for even cooking.
3️⃣ Season Pork Shoulder: season pork with a generous coating of your favorite dry rub. Use a bbq seasoning blend or a simple seasoning of salt, pepper and garlic powder.
4️⃣ Seal Seasoned Pork: once your pork is dried and seasoned seal in vacuum seal bags or a freezer ziploc bag using water displacement method (see below)
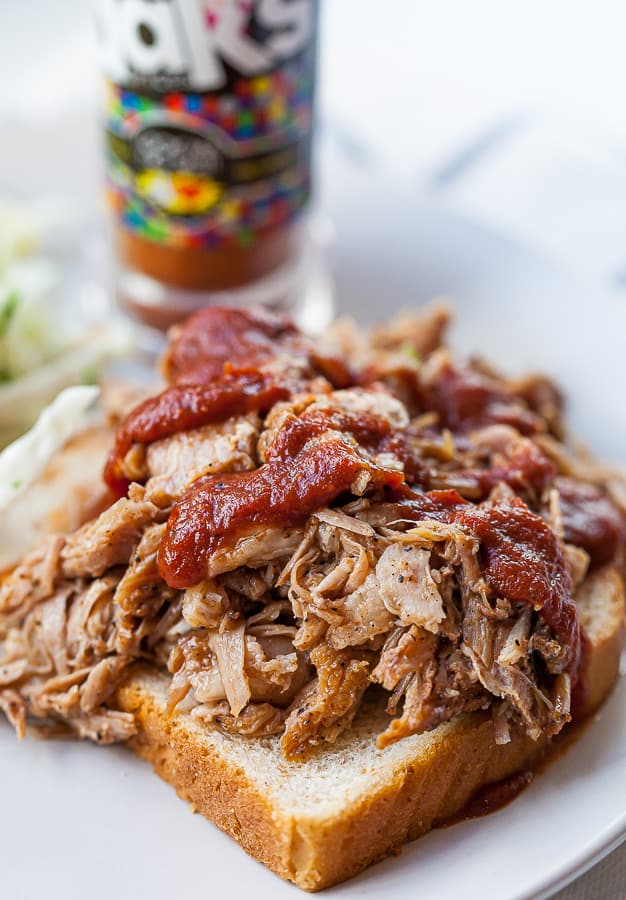
5️⃣ Add Pork To Water Bath: cook for 18-24 hours at 165 degrees. When it’s finished, remove from bags and shred with 2 forks, meat claws or use your stand mixer. If you’d like to crisp up some pieces, layer on a baking sheet and place under broiler for 3-4 minutes or until desired consistency is reached.
5️⃣ If you’re keeping it for later use: add to an ice bath for 15 minutes in order to cool down enough to add in fridge safely.
❔ FAQ
Using a vacuum sealer removes all the air from a bag, and heats the edge to seal it closed. The water displacement method involves using a freezer-safe resealable food storage bag and while the bag isn’t fully sealed, slowly lowering the pork shoulder into the water to force the air out. Either method would work fine but for a couple of reasons, I prefer a vacuum sealer. While there isn’t a safety issue if you do remove all of the air with the displacement method, it is challenging to remove all the air. Too much air causes can cause off putting flavors or spoilage. At higher temperatures or longer cook lengths, the seals on the sides and bottom of a freezer-safe resealable food storage bag could possibly fail, causing a mess and ruining the cook if left unattended.
Absolutely! Sous vide pulled pork maintains good quality for two to three months after freezing. If stored in a vacuum sealed bag, pulled pork can last for two to three years. Since you’re already making the best sous vide pulled pork, make a double batch and freeze the second.
I always make extra sous vide bbq pulled pork, freeze it, and reheat it. If reheating from the refrigerator, it will only take about 30 minutes in an 80-90 degree water bath. From frozen, I recommend allowing 1 hour and 15 minutes.
🍽 Side Dishes For Pulled Pork
- Classic Coleslaw
- Cucumber Dill Salad
- Gluten Free Cornbread
- Dill Pickle Coleslaw
- Mexican Street Corn Pasta Salad
More Sous Vide Recipes
- Sous Vide Chicken Breast
- Sous Vide Corned Beef
- Sous Vide Sweet Potatoes
- Sous Vide Pork Chops
- Sous Vide Chicken Thighs
- Sous Vide Glazed Baby Carrots
- Sous Vide Mashed Potatoes

Sous Vide Pulled Pork
Ingredients
- 3-5 lbs Pork Shoulder or Pork Butt
- ¼- cup BBQ Dry Rub Seasoning or Seasoning of choice
- 2 tsp Salt
- NOTE: If dry rub seasoning already contains salt adjust your additional salt to taste
Instructions
- Prepare Water Bath: grab a large pot and fill with enough water to cover the pork. Using your sous vide, heat the water bath to 165 degrees.
- Prepare The Pork Shoulder: remove from package and pat dry with paper towels. Decide whether or not it needs to be cut into smaller pieces in order to fit in vacuum seal bags for even cooking.
- Season Pork Shoulder: season pork with a generous coating of your favorite dry rub. Use a bbq seasoning blend or a simple seasoning of salt, pepper and garlic powder.
- Seal Seasoned Pork: once your pork is dried and seasoned seal in vacuum seal bags or a freezer ziploc bag using water displacement method (see below)
- Add Pork To Water Bath: cook for 18-24 hours at 165 degrees. When it’s finished, remove from bags and shred with 2 forks, meat claws or use your stand mixer. If you’d like to crisp up some pieces, layer on a baking sheet and place under broiler for 3-4 minutes or until desired consistency is reached.
- If you’re keeping it for later use: add to an ice bath for 15 minutes in order to cool down enough to add in fridge safely.
