Instant Pot Ghee
Learn how to make homemade Instant Pot Ghee! A pressure cooker is used to separate the milk solids from unsalted butter, leaving pure butterfat with hints of nutty and sweet caramel flavor. Making ghee in an Instant Pot is easier, cheap and tastes so much better than store-bought!
I started making homemade ghee when I realized how expensive it is from the store. Butter costs a fraction of what store-bought ghee costs, but no worries! Follow my step-by-step instructions and you’ll see how simple it is to transform cheap butter into “liquid gold.”
Not everyone is familiar with ghee. That’s okay! Ghee has been used in Indian cooking for centuries. It’s gained popularity in other parts of the world, particularly with those who are sensitive to lactose and casein in dairy. For those doing a Whole30 reset, ghee has become a kitchen staple.
💓 Why You’ll Love This Recipe
Making ghee from butter is significantly less expensive than buying a jar from the store, it tastes better and it makes your house smell like a candy store.
Ghee has a high smoking point, so it’s great for everyday cooking, like sauteing, searing, roasting, etc.
Ghee, which eliminates the milk solids, may be easier to digest if you’re lactose intolerant or sensitive to dairy.
Ghee is definitely all fat, but in moderation, it’s good fat! The monounsaturated Omega-3s in ghee can help reduce unhealthy cholesterol levels, promoting a healthy heart and cardiovascular system.
Ghee vs. Clarified Butter
- Clarified Butter: is butter that has been cooked just long enough to have the water evaporate and the solids separate. The oil portion is used as clarified butter.
- Ghee: is butter that has been cooked enough to have the water evaporate AND have the milk solids caramelize for more of a nutty flavor
Another point I should make is that clarified butter takes a short time to make while ghee takes quite a bit longer for everything to separate fully. This is where using an Instant Pot makes life easier, so you don’t have to babysit your pot for hours on the stove.
🧈 Ingredients You’ll Need
For this recipe, all you need is 24 ounces or 3 sticks of grass-fed unsalted butter. You can use regular butter from grain-fed cows -just keep in mind that butter from grass-fed cows is much higher in Omega-3 fatty acids and a more nutritious choice all around.
📖 How To Make Ghee in the Instant Pot
1️⃣ Make sure your Instant Pot is completely dry before adding butter.
2️⃣ Press SLOW COOK on your instant pot and make sure the heat is set to normal. Add butter and cook for 2 hours uncovered. You will see the milk solids have completely settled to the bottom. This can be strained and made into clarified butter.
3️⃣ For ghee, turn on SAUTE for 4 to 5 minutes keeping an eye on the color. Make sure your splatter guard is on top of your instant pot as splattering may occur.
4️⃣ As soon as 5 minutes are up, remove the sleeve and let residual heat continue to cook the milk solids. If the solids are brown, this is ok! Just make sure they do not get burnt.
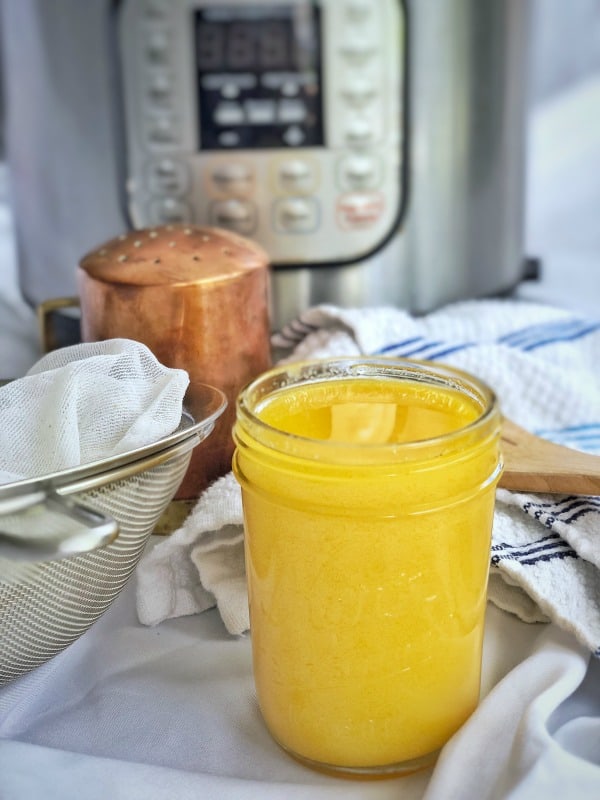
5️⃣ Once the ghee is cooled down a bit, but place your cheesecloth or nut milk bag on top of your mesh strainer and strain brown butter into glass jars.
👉 Recipe Tips
- Buy butter in bulk! I like purchasing Kerry Gold Irish Butter from Costco to make ghee. It’s great-tasting and you can’t beat the wholesale price.
- For pure butterfat with a straightforward buttery flavor, skim the milk solids as soon as they rise to the top and then strain the remaining liquid.
- For an AMAZING toffee-like flavor, let the milk solids brown and caramelize before straining them away from the butterfat.
- The longer the milk solids are left to caramelize, the better -just watch that they don’t burn. You’ll know when the solids are caramelizing because your house will start to smell like butterscotch.
👉 How to Make Ghee in a Slow Cooker
Ghee can also be made in a crockpot or a slow cooker using the exact same method as the recipe below. The only difference is that cooking ghee in a slow cooker will take double the time, sometimes triple depending on how hot your slow cooker gets.
1️⃣ Place the butter in the slow cooker and set it to cook on high for 4 hours. Prop the lid halfway off, so it catches any splatter and the moisture can evaporate.
2️⃣ After about 2 hours, there will be a white foam at the top. You can skim and strain at this point for clarified butter or let it go longer. The milk solids will eventually turn brown resulting in brown butter ghee.
3️⃣ Once the liquid has cooled down a bit, place your cheese cloth or nut milk bag on top of your mesh strainer and strain ghee into glass jars.
🔁 Variations
Take your homemade ghee a step further and infuse it with more flavor. To do so, simply add the extra ingredients to the Instant Pot with the butter and let it do its thing.
For garlic-infused ghee, add a few garlic cloves to the IP and strain away from the milk solids before they caramelize.
For something on the sweeter side, check out my recipes for vanilla bean sea salt ghee and 4th & Heart copycat vanilla ghee.
♻️ Storing & Freezing
Storing: Since the milk solids are removed, ghee has a great shelf-life and can be stored at room temperature. Homemade ghee can be stored at room temperature for up to 3 months. Sealed jars of ghee can be stored unopened at room temperature for up to 9 months.
Freezing: Store cooled ghee in freezer-safe containers in the freezer for up to a year. Be sure to thaw and bring back to room temperature before using for cooking.
❓FAQ
Yes. The flavor will just be saltier, so keep that in mind when using it for cooking.
Clarified butter is left on the heat just until the milk solids rise to the top. The milk solids are then skimmed away leaving just the pure butterfat “aka liquid gold.” Ghee is butter that has cooked to the point that the milk solids caramelize, lending a toffee-like flavor.
You can, but this is where using an instant pot makes life so much easier. Otherwise, you’ll have to babysit your pot on the stove top for hours.
Making ghee in the IP may result in a grainy-texture once it cools down. This IS NOT a bad thing. I’ll let the experts explain:
‘”As a ghee maker, the gritty texture is difficult to achieve and is considered an accomplishment. Having the grainy texture gives the ghee a higher medicinal value. It is an indicator that the ghee has been done correctly. The temperature has been kept low, so all of the antioxidants are intact.” – SOURCE
If it’s black and it smells burnt, then yes and there’s really no coming back from a batch of burnt ghee. To prevent it from happening next time, take note of how it smells. Once it has a distinct candy-like smell, the milk solids have begun caramelizing and the ghee is well it’s on it’s way to being ready to strain.
Brown butter ghee is when the milk solids caramelize to the point that they are brown and toasty lending an amazing nutty toffee-like flavor to the butterfat once strained.
More Recipes You’ll Love
Vanilla Bean Sea Salt Ghee Recipe
Vegan Pumpkin Spice Creamer Recipe
Whole30 Coffee Guide

Instant Pot Ghee
Ingredients
- 24 oz Grass Fed Butter
Instructions
- Make sure your instant pot is completely dry before adding butter.
- Press SLOW COOK on your instant pot and make sure the heat is set to normal. Add butter and cook for 2 hours uncovered.
- You will see the milk solids have completely settled to the bottom. This can be strained and made into clarified butter.
- For ghee, turn the instant pot onto SAUTE for 4-5 minutes keeping an eye on the color. Make sure your splatter guard is on top of your instant pot as splattering may occur.
- As soon as 5 minutes are up, remove sleeve from instant pot and let residual heat continue to cook the milk solids. If the solids are brown, this is ok! Just make sure they do not get burnt.
- Once ghee is cooled down a bit, put place your cheese cloth or nut milk bag on top of your mesh strainer and strain brown butter into glass jars.
Notes
- Place the butter in the slow cooker and set it to high for 4 hours with lid half way on so that moisture can evaporate and not cause splattering. Keep the lid on the slow cooker only half way so the moisture can evaporate.
- After about 2 hours, there will be a white foam at the top which will eventually turn brown.
- Once brown butter is cooled down a bit, put place your cheese cloth or nut milk bag on top of your mesh strainer and strain brown butter into glass jars.